
Every practice has a version of this morning. It’s 10:40 on a Tuesday, a vomiting Lab with a suspected linear foreign body is on the table, and the X-ray console throws an error code nobody recognizes. Or the ultrasound has a faint vertical shadow you’ve been scanning around for three weeks, and today it matters because you’re trying to decide whether that’s a small splenic nodule or an artifact.
Equipment rarely fails without warning. It gives us signs, and as clinicians we’re remarkably good at compensating for them. We retake the radiograph. We angle the probe to dodge the shadow. We nudge the vaporizer up because “this machine always runs a little light.” The trouble is that compensation becomes invisible over time, and the cost moves somewhere harder to see: into retakes, diagnostic uncertainty, staff exposure, and eventually a complete failure on the worst possible day.
This guide is written the way I’d want a colleague to explain it to me: how to recognize genuine failure in the equipment we depend on most, how to separate a real fault from normal behaviour, how to think about the money, and who to call when something goes wrong.
The Rule Worth Adopting: If Your Team Has a Trick, You Have a Problem
Before getting into specific modalities, one principle covers almost everything. A machine that works 90% of the time is not 90% as useful. A radiograph that needs two exposures instead of one doubles the dose to the patient and to whoever is in the room, which runs straight against ALARA. A transducer with dead elements can hide pathology or invent it. An anesthesia machine with a slow leak changes the concentration your patient actually receives and puts waste gas into the air your team breathes all day.
So if anyone on your team has developed a workaround (“jiggle the cable,” “wait a minute between shots,” “run the flow a bit higher”), write it down. That workaround is a symptom, and it belongs in front of a technician.
Digital and CR X-Ray: Reading the Warning Signs
Track your retake rate
The single most useful early warning for radiography is one most clinics never measure: the retake rate. If your team is repeating more studies than it used to on similar patients with the same technique chart, something has drifted. Positioning and body condition get blamed first, and sometimes rightly, but a steadily climbing retake rate is also one of the earliest signs of generator output drift or detector problems. Keeping a simple tally for a month gives you a baseline, and a baseline turns a vague feeling into useful information for your technician.
DR panel problems
On direct radiography systems, watch for fixed lines or clusters of dead pixels, ghosting (a faint remnant of the previous image), and gradual non-uniformity across the field. Many of these are calibration issues rather than hardware failure, since DR detectors rely on periodic gain and offset calibration to produce even images. Physical damage is the expensive category. Wireless panels get dropped, stepped on, and loaded unevenly under heavy patients, and a cracked detector is one of the costliest repairs in veterinary imaging. If your team uses wireless panels in the field or under large animals, protective handling deserves as much training as positioning does.
CR plate or reader?
On computed radiography systems, a recurring streak or spot is diagnostic if you think about where it lives. If the artifact follows one particular imaging plate across different patients, the plate is scratched or damaged. If it appears on every plate, the reader is the problem. A faint ghost of the previous study appearing on the next image often points toward the reader’s erasure stage. Plates are consumables and relatively inexpensive to replace; reader faults are a service call. If your CR system is aging and repairs are becoming routine, our guide on when to upgrade from a CR to a DR X-ray system walks through that decision.
Thermal limits versus true failure (especially on portables)
This one catches a lot of mixed and equine practitioners. Many portable generators use a stationary anode with a modest heat capacity. The Poskom PXP-40HF, for example, is a stationary-anode unit with a rated heat capacity of 20,000 heat units and a cooling rate of about 250 HU per second. That’s plenty for routine work, but a rapid-fire series of limb views on a horse can push any portable toward its thermal limits, and a unit that pauses or locks out to protect its tube is doing exactly what it was designed to do. That’s a workflow issue, not a repair.
The signs of genuine failure look different: exposures that abort partway, readouts that don’t match what you selected, error codes that persist after a proper cooling period, or unusual sounds during exposure. Those warrant a call.
Collimator alignment
A burned-out collimator lamp is a simple fix. A light field that no longer matches the actual radiation field is more serious, because you’re either irradiating tissue outside your intended area or cutting off anatomy you believe you captured. A quick check: place a metal marker (a coin or paperclip) at each edge of the light field and make an exposure. The edges of the image should line up closely with your markers. A common acceptance tolerance is within about 2% of the source-to-image distance. If they’re noticeably off, have it assessed.
Fixed systems and remote diagnostics
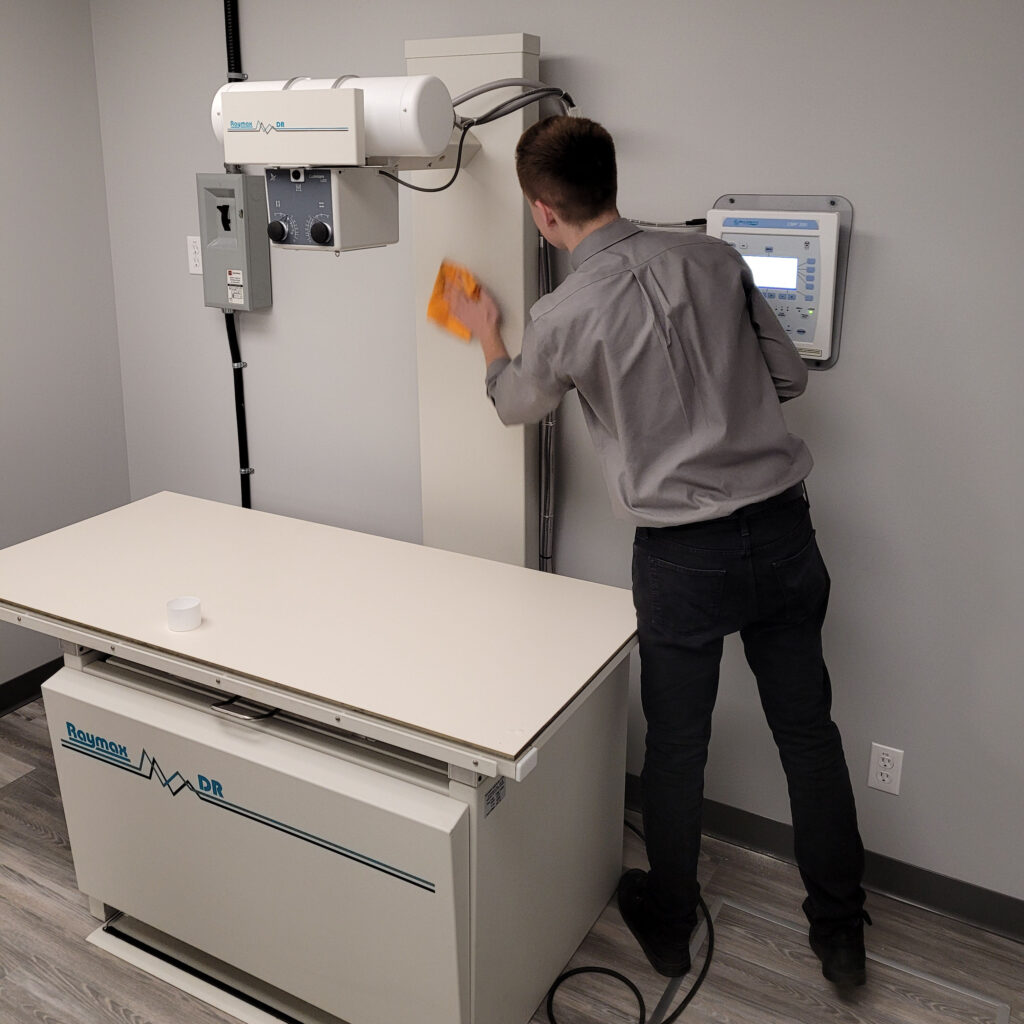
Modern fixed systems are easier to troubleshoot than many of us assume. The UVEO HF 400 Complete Plus, for instance, runs on stored capacitor energy from a standard 110 V, 15 A outlet and can be networked for remote, web-based diagnostics. In practical terms, that means a technician can often look at what the system is reporting before anyone gets in a truck, which shortens the path from “it’s not working” to “here’s the part we need.” Its mechanical tabletop interlocks also stay locked during a power failure, which is worth knowing so that a locked table during an outage isn’t mistaken for a fault.
The safety line nobody crosses
X-ray generators operate at lethal voltages. Nobody in the clinic should remove covers or attempt internal troubleshooting, and doing so can also void warranty coverage. Radiation safety is also a regulatory matter in Canada, not just a best practice. Health Canada’s Safety Code 28: Radiation Protection in Veterinary Medicine sets out recommended procedures for installation and use of veterinary X-ray equipment, and several provinces reference it directly in regulation. New Brunswick’s occupational health and safety regulation, for example, requires employers and X-ray workers to ensure equipment is installed, used, maintained, repaired, and inspected in accordance with the applicable safety code. Requirements differ by province, so check with your provincial authority (in Saskatchewan, that’s the Government of Saskatchewan radiation safety program). After major component work such as a tube replacement, expect to confirm the unit still meets requirements through a compliance inspection.
Ultrasound: It’s Usually the Probe
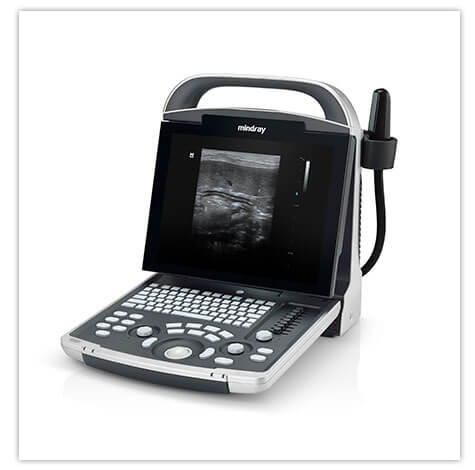
In my experience, most ultrasound problems are transducer problems. The console sits on a cart or a shelf. The probe gets dropped, has its cable rolled over by a stool, is wiped with whatever disinfectant is closest, and is pressed against patients hundreds of times a week.
Dead elements: the shadow that doesn’t move
A transducer is an array of small piezoelectric elements. When one or more fail, you see a thin, dark vertical band running down the image from the probe face. The feature that separates it from a true acoustic shadow is simple: an acoustic shadow moves with the anatomy producing it, while a dead-element shadow stays in exactly the same position on the screen no matter where you scan.
This matters more than it seems. Beyond B-mode image quality, published research has shown that dead elements can affect the accuracy of Doppler measurements, which is relevant to anyone doing cardiac or vascular work.
Two quick in-clinic checks:
- The in-air test. Hold the clean, dry probe in air with gain turned up. The reverberation lines near the top of the screen should be uniform across the full width. Gaps or dark columns suggest element dropout.
- The paperclip test. Apply gel and slowly drag the edge of a paperclip across the lens from one end to the other while watching the screen. The bright reflection should track smoothly across. Where it disappears, you’ve found your dead zone.
For a more objective assessment, imaging a tissue-mimicking phantom is the method the American Institute of Ultrasound in Medicine recognizes for revealing image degradation over time.
Lens, housing, and cable damage
Inspect the lens face under good light. Cracks, bubbles, peeling edges, or discoloration mean the acoustic lens is compromised. This is an image-quality problem and, more importantly, a safety one: a breached lens or cracked housing allows fluid ingress, which creates an electrical leakage risk for patient and operator.
Disinfectant choice is one of the most common and most preventable causes of lens damage. The AIUM’s 2025 transducer cleaning guidelines note that following cleaning methods other than the manufacturer’s instructions can damage transducers and affect diagnostic results, and they recommend regular inspection of the connector, cable, housing, and acoustic lens. In plain terms: check your disinfectant against your probe manufacturer’s approved list, and make a monthly probe inspection part of someone’s routine.
If the image flickers or drops out when you flex the cable or touch the connector, suspect a broken conductor inside the cable. Look closely at the strain relief where the cable enters the housing, since that’s where most cable failures begin.
Large animal and reproductive probes live a harder life
For mixed and food animal practitioners, rectal linear probes are working in about the harshest environment any medical device sees: manure, cold barns, sudden animal movement, and constant cable tension. Probes like the ReproScan XTL, BoviScan Linear, and Apexx Linear are built for this work, but every probe used rectally should be treated as an internal-use device that gets inspected often. Watch for hairline cracks in the housing, a lens that looks cloudy or lifted, and fraying where the cable meets the probe body, because a cow that shifts mid-exam puts all of its force on that one point.
Wireless viewing accessories add their own failure pattern. If your OJO4 goggles or wireless ultrasound monitor are dropping their connection more often or not lasting through a herd check, battery degradation is the usual cause, and it’s generally a straightforward fix. Cold temperatures also shorten battery life and slow LCD response, so a unit that struggles only in January may be behaving normally for the conditions.
Console symptoms
Console problems are less common but recognizable: frequent freezing, sluggish response, overheating (often a clogged dust filter or failing fan), trackball or keyboard failure, and software crashes. Cart-based systems like the Mindray Z60 Vet and Vetus E7 benefit from simply keeping air vents and filters clean. On portable systems like the Mindray M9Vet or DP-50 Vet, declining battery runtime and worn hinges or connectors are the common wear points.
The encouraging part: ultrasound probe repair is often possible and frequently costs a fraction of a new transducer, particularly for lens replacement, cable repair, and some element faults. Get a professional assessment before assuming a probe is finished. You can browse the full range of veterinary ultrasound systems if replacement does turn out to be the right call.

Anesthesia Machines: No Workarounds, Ever
Anesthesia equipment is where the habit of working around a fault becomes genuinely dangerous. The 2020 AAHA Anesthesia and Monitoring Guidelines for Dogs and Cats call for a pressure (leak) check of the machine before every use. A machine that fails that check should not go on a patient until the cause is found.
Separating consumables from real faults
A lot of apparent machine failures are actually consumables, and knowing the difference saves a service call.
Rising inspired CO2 on the capnograph is a classic example. It has two common causes: exhausted CO2 absorbent and a sticking unidirectional valve. AAHA suggests changing absorbent after about 8 hours of use, and replacing it is the first step. If fresh absorbent doesn’t correct the problem, look at the valves. AAHA describes a simple check: breathe through the circuit and watch that the correct valve moves on inspiration and on expiration. A valve that sticks, flutters, or doesn’t seat properly needs attention.
Leaks most often come from the absorbent canister seal, cracked or perished hoses, worn O-rings, or connections that weren’t fully seated after cleaning. On machines with a single-seal canister design like the Supera M4000, a worn seal is a quick and inexpensive replacement, which is exactly why it’s worth diagnosing properly rather than living with a slow leak.
Flowmeter floats that stick, bounce, or don’t return to zero are worth reporting, since flow accuracy underpins everything else.
Vaporizers drift, and you won’t feel it
A vaporizer can gradually drift out of calibration and deliver more or less agent than the dial says. Clinically, this shows up as patients who seem consistently lighter or deeper than expected at your usual settings, or a machine your team has quietly learned to “run a little higher.” That’s the workaround warning again. Vaporizers such as the Tec 3 series are designed to compensate for temperature and flow changes, but they still need periodic service and calibration to stay accurate. One related point from AAHA: total oxygen flow should generally be at least 500 mL/min to ensure accurate vaporizer output, so very low flow settings can create inaccuracy even in a well-calibrated unit.
Oxygen generator machines
Machines with integrated oxygen generation, like the Pureline M6000 and Pureline M8000, remove the tank logistics from your day and include audible and illuminated safety alerts plus a backup oxygen supply. Treat any alert as real. Switch to backup, finish the procedure safely, and call before the next case rather than silencing the alarm and carrying on.
Scavenging and monitoring
Scavenging failures are often noticed first by people, not machines: staff reporting headaches or the smell of anesthetic agent in the room. Take those reports seriously. Waste gas exposure is a workplace safety issue, and the fix is usually simple once someone looks.
Your patient monitor deserves the same attention. An SpO2 probe that won’t read on a well-perfused patient, NIBP values that don’t fit the clinical picture, or a noisy ECG trace are very often sensor, cuff, or cable problems. They’re inexpensive to fix, and they restore trust in the numbers you’re making decisions from.
Other Equipment Worth Watching
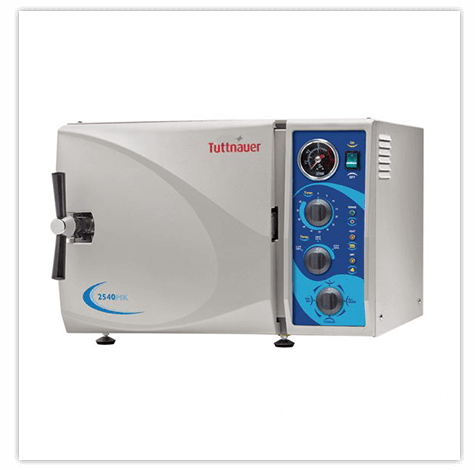
Autoclaves. Failed biological or chemical indicators, wet packs at the end of a cycle, cycles taking longer than usual, a worn or flattened door gasket, and recurring error codes all warrant service. A sterilizer that can’t be trusted is a surgical infection risk, and your sterilization records are only as meaningful as the machine producing them. See our range of sterilizers if yours is near the end of its life.
Dental units. Falling handpiece speed or torque, irregular water spray, oil in the air lines, and a compressor that runs constantly or cycles too often are the usual warnings. Remember that dental X-ray units fall under radiation safety requirements just like your main system.
Electrosurgical units. Inconsistent cutting or coagulation at settings that normally work, return electrode alarms, and visible damage to cables or handpieces are the signs to act on. Browse electrosurgery equipment for current options.
Who to Call, and What to Have Ready
A structured approach gets you back to work faster and makes your technician’s job easier.
- Do the basic checks. Confirm power and outlets, make sure cables and connectors are fully seated, restart the unit if the manufacturer allows it, and ask what changed recently: a moved machine, a software update, a new team member using different settings, a new disinfectant.
- Document before you call. Have the make, model, serial number, and software version ready. Photograph any error codes and image artifacts. Note when the problem started and whether it’s constant or intermittent. For intermittent faults, a short phone video is often worth more than a paragraph of description.
- Call a qualified service provider. For X-ray, anesthesia, and anything with patient-safety or regulatory implications, work with technicians trained on veterinary and medical equipment rather than a general electronics shop. Ask about turnaround, whether the repair can happen on-site or needs shipping, and whether a loaner is available.
Intriquip’s veterinary equipment repair service is a factory-authorized service centre for many of the brands we supply, which means warranty repairs can be handled directly. Phone support and troubleshooting are free, repair estimates are free, and if a unit can’t be fixed on the spot, a free loaner keeps you working while yours is in the shop. You can call 1-800-361-3777 or submit a service request online. For clinics that want scheduled coverage rather than reacting to breakdowns, the Just Works service plan builds maintenance and repairs into a regular schedule.
- Log it. Keep a simple equipment log: date, symptom, repair, cost, and days out of service. Over a year or two, that log becomes your most valuable tool for the repair-or-replace decision.
The ROI Question: What Downtime Really Costs
Most practices underestimate downtime because it never arrives as a single invoice. It’s spread across rescheduled appointments, cases referred elsewhere, overtime, and the quieter cost of making decisions with less information.
A practical way to estimate it: take the average daily revenue that depends on that piece of equipment (imaging fees, plus the surgical and dental procedures that can’t happen without it), multiply by the days it’s out of service, then add the harder-to-count costs: referred cases that may not come back, staff time spent working around the problem, and client goodwill.
As an illustration only, if radiology generates $1,000 a day in your practice and a repair takes five business days including shipping, that’s roughly $5,000 in deferred or lost revenue before the repair invoice arrives. Your numbers will differ, but running the calculation usually changes how a practice thinks about three things: preventive maintenance, loaner availability, and turnaround time. A loaner that keeps imaging running turns five lost days into zero, which is often worth more than the repair itself.
There are also returns that never appear on a revenue report. Fewer retakes means lower cumulative dose for your team. Accurate monitors and calibrated vaporizers mean safer anesthesia. Reliable equipment means fewer frustrated staff, and in a profession struggling with retention, that isn’t a small thing.
Repair or Replace: A Framework That Holds Up
There’s no universal formula, but five questions cover most decisions:
- What does the repair cost compared with replacement? A widely used rule of thumb is to seriously consider replacement when a repair approaches half the cost of new equipment, particularly on an older unit.
- Where is the unit in its expected service life? A major repair near the end of a machine’s life buys less time than the same repair on a younger machine.
- Are parts and software still supported? Once a manufacturer ends support, every future repair becomes slower, harder, and more expensive.
- Is this a pattern? Your log will tell you. Three significant repairs in two years is a trend, not bad luck.
- Is the technology holding you back? Sometimes the question isn’t whether it can be fixed but whether fixing it keeps the practice behind. A CR system that still works may make an excellent backup while primary imaging moves to DR.
The reverse is just as important: don’t retire equipment with years of good life left because of a single failure. Ultrasound probes, monitors, anesthesia components, and autoclave seals are often very repairable, and a quality repair is frequently the best value in the building.
When replacement does make sense, equipment financing can spread the cost over the useful life of the new unit, and older equipment may still have value through selling used equipment toward the upgrade.
Prevention Is the Cheapest Repair
Nearly every failure described here is easier and less expensive to catch at a scheduled inspection than in the middle of a surgical day. Preventive maintenance inspections, vaporizer calibration, and X-ray compliance testing are where small problems get found while they’re still small. For a checklist-style approach, see our guide to veterinary equipment maintenance for Canadian clinics.
Frequently Asked Questions
How do I know if my ultrasound probe needs repair?
The most common signs are a dark vertical shadow that stays fixed on the screen regardless of where you scan (dead elements), visible cracks, bubbles, or peeling on the lens, and an image that flickers when the cable is flexed. An in-air test with the gain turned up, or dragging a paperclip across the gelled lens, will usually reveal element dropout.
Can an ultrasound probe be repaired, or does it need to be replaced?
Many probe faults are repairable, including lens replacement, cable and strain relief repair, and some element failures. Repair often costs a fraction of a new transducer, so a professional assessment is worth getting before you replace it.
Why does my portable X-ray pause between exposures?
Many portable generators use a stationary anode with limited heat capacity, and they pause or lock out to protect the tube during rapid exposure series. That’s normal protective behaviour. Aborted exposures, mismatched readouts, or error codes that persist after cooling suggest a real fault.
Is it worth repairing an older veterinary X-ray machine?
It depends on the repair cost relative to replacement, the unit’s age, and whether parts and software are still supported. If a repair approaches half the cost of new equipment on an aging unit, replacement is often the better investment. For newer, supported units, repair is usually worthwhile.
Can I keep using an anesthesia machine that fails its leak test?
No. The 2020 AAHA guidelines call for a pressure check before every use, and a machine that fails should be taken out of service until the leak is found and fixed. Leaks change delivered anesthetic concentration and expose staff to waste gas.
What should I have ready when I call for an equipment repair?
The make, model, serial number, and software version, plus photos of any error codes or artifacts. Note when the problem started and whether it’s constant or intermittent. A short video of an intermittent fault is extremely helpful.